Conflict
Mailing List
Source
Issues
Windows Download
Eclipse Download
Server Download
Author
Downloading and Installing the Conflict Server
A Conflict server is typically installed once per project; it is not installed on each developer workstation.
- Download and install Ruby (1.8.5 or 1.8.4), or use the Windows installer.
- Download RubyGems. Once extracted, run "ruby setup.rb".
- At any command prompt, enter "gem install conflict". You should see console output similar to "Successfully installed conflict-x.x.x".
- At any command prompt, enter "conflict" to start the server. You should see logging output similar to the following.
[2007-08-19 13:51:00] INFO WEBrick 1.3.1
[2007-08-19 13:51:00] INFO ruby 1.8.5 (2006-12-25) [i386-mswin32]
[2007-08-19 13:51:00] INFO WEBrick::HTTPServer#start: pid=6052 port=80
Downloading/Installing a Conflict Client for Windows
A Conflict client is typically installed once per developer workstation.
- Download the latest version of the Conflict Client msi installer (requires the .NET Framework 2.0).
- Double click the installer and a setup wizard will guide you through a few screens (install location, license agreement, etc.).
- Once you have completed the insall wizard, you must to manually start Conflict (look under Start -> Programs -> Startup ) or restart your machine. If your operating system previously disabled balloon tips in the system tray, you will have to restart the machine.
-
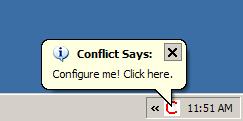
You will know Conflict is running because the Conflict icon will appear in your system tray. Follow the instructions in the little balloon that appears when Conflict first starts.

-
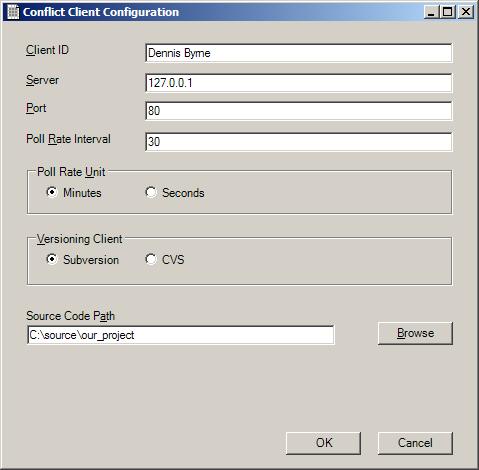
The Conflict configuration screen will appear. This screen can also be reached in the future via the menu that appears when you right click on the Conflict tray icon.

- The Client ID setting is used to uniquely identify each developer.
- The Server and Port settings represent the network connection to where the Conflict server is running.
- The Poll Rate settings determine how often the Conflict client will poll the file system.
- The Versioning Client setting tells Conflict which versioning software you are using. Conflict will assume you have a Subversion or CVS command line client installed.
- The Paths directory tells the Conflict client which checkout directory to monitor.
Downloading/Installing a Conflict Client for Eclipse 3.2+
A Conflict client is typically installed once per developer workstation.
- Download the Eclipse plugin and install it by copying it to YOUR_ECLIPSE_DIR/plugins directory.
- Restart Eclipse.
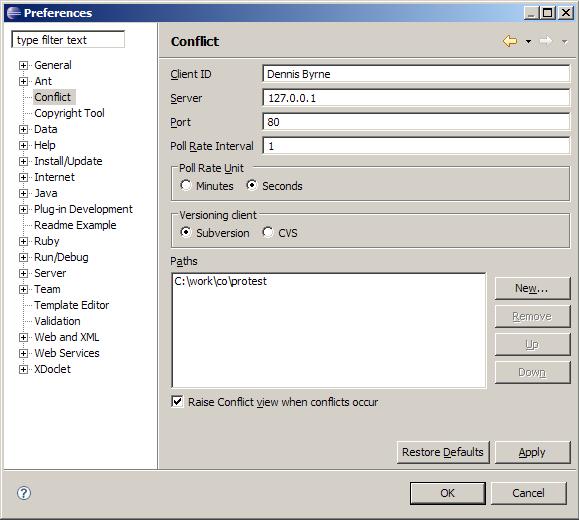
- Under the "Window" top menu item in Eclipse, go to Preferences. On the left hand side, select the "Conflict" node.

- The Client ID setting is used to uniquely identify each developer.
- The Server and Port settings represent the network connection to where the Conflict server is running.
- The Poll Rate settings determine how often the Conflict client will poll the file system.
- The Versioning Client setting tells Conflict which versioning software you are using. Conflict will assume you have a Subversion or CVS command line client installed.
- The Paths directory tells the Conflict client which checkout directories to monitor.
- Hit the "OK" button to save your settings.
- Under the "Window" top menu item in Eclipse, go to "Show View", "Other", "Other" or "Conflict", and select the Conflicts view.
- Start the Conflict client by hitting the green "Go" button on the right.
